
Reviewed · CRAFT & ARTISAN WORKSHOPS
Calligraphy & print your calligraphy on a T-shirt.
Ink and your own design in one hour.
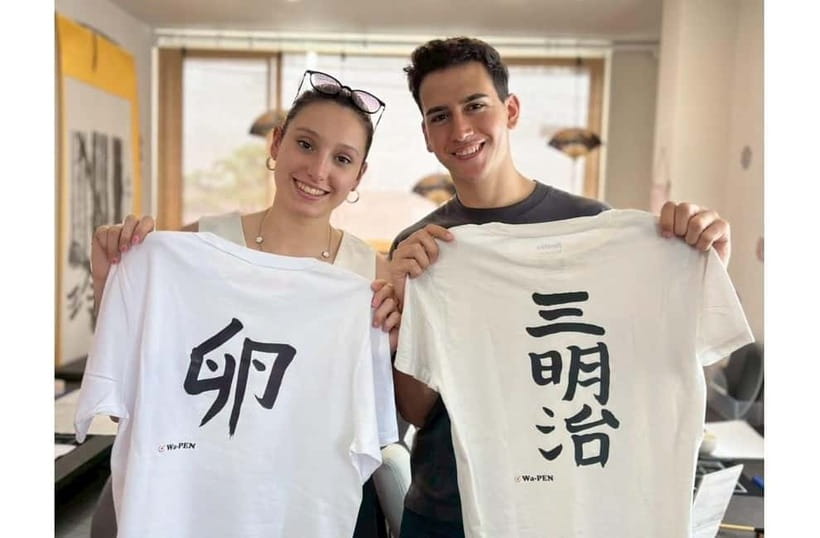
This class is a hands-on mix of Japanese calligraphy and practical making, ending with your T-shirt printed for you to take home. I love how you’re taught both the why (characters and culture) and the how (brush control with a Fude pen). One thing to keep in mind: you’ll use real ink, so wear clothes you don’t mind getting stained.
You’ll also get the satisfying basics—starting with a history-style intro, then writing on thin paper so you can learn without panic. I especially like that you mix ink yourself with water and a Sumi ink stick, then practice before you commit your chosen design to fabric. The pace is relaxed, but it’s still a craft class, so if you want lots of chatting or total quiet, plan for an active session.
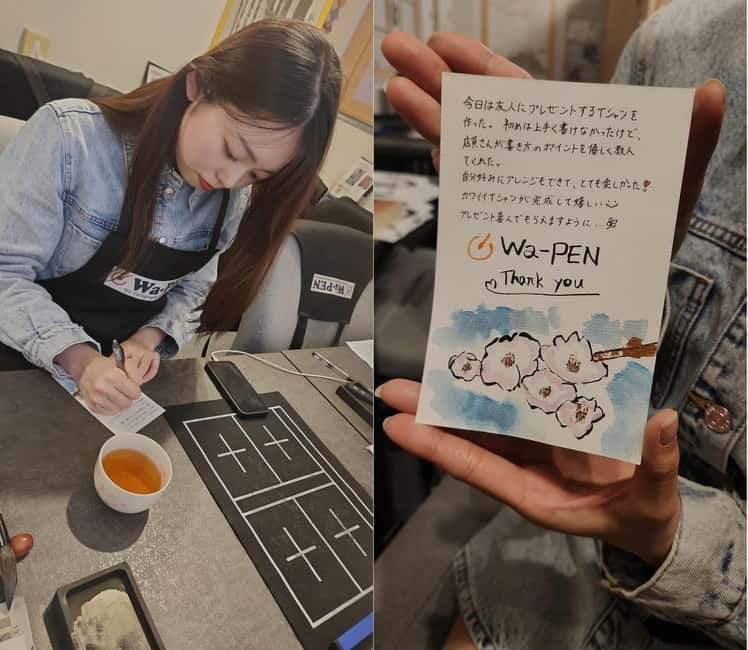
The finale is charmingly low-pressure: a green tea break while you write a postcard, followed by the moment you see your design transferred onto your shirt. I like that it feels personal without requiring you to already know calligraphy. If you’re worried about first-attempt results, don’t—this is built for beginners and guided practice with expert support from Mana.
In This Review
- Key Highlights Worth Your Time
- Finding the Red Brick Building (and Getting There Without Stress)
- The Culture Starter: Japanese Characters and Why They Look the Way They Do
- Meet the Fude and Learn the Basics Without Overthinking
- Mixing Sumi Ink the Old-School Way (With an Inkstone)
- The 30-Minute Practice Window: Thin Paper, Brush Control, and a Postcard
- Choosing Your Design and Printing on a T-Shirt
- Green Tea While You Write: The Souvenir Part That Feels Just Right
- Price and Value: What $48 Really Buys You
- Who This Suits Best (and Who Might Find It Less Ideal)
- Tips That Make Your Session Smoother
- Should You Book This Japanese Calligraphy T-Shirt Class?
- FAQ
- What is the duration of the calligraphy and T-shirt class?
- How much does it cost?
- What will I make during the class?
- Is the instruction available in English?
- What should I wear to the class?
- What is the meeting point exactly?
- Do I need to bring my own materials?
- What is the final timing for the printed shirt?
Key Highlights Worth Your Time
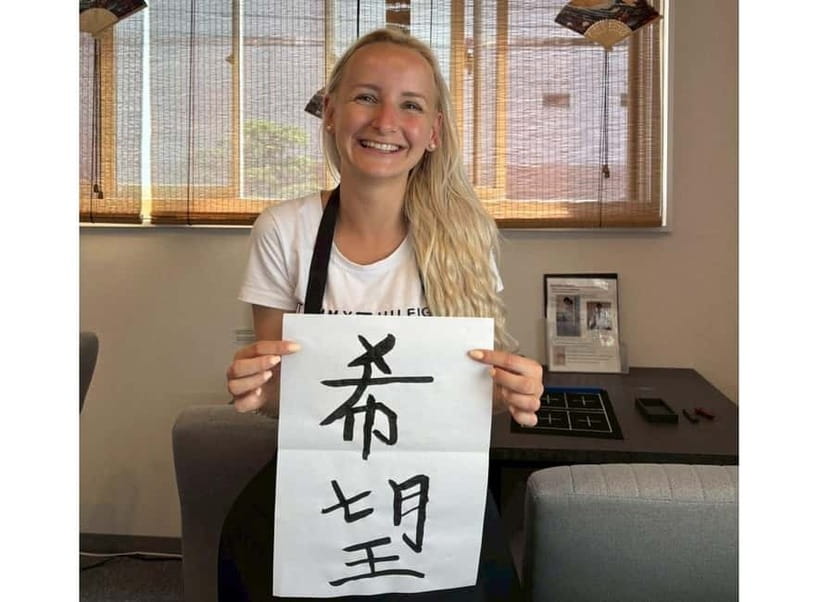
- History + hands-on shodo so you understand what you’re writing, not just copying shapes
- Ink-making first using a Sumi ink stick, water, and an inkstone
- Guided brush practice on thin paper to train your strokes early
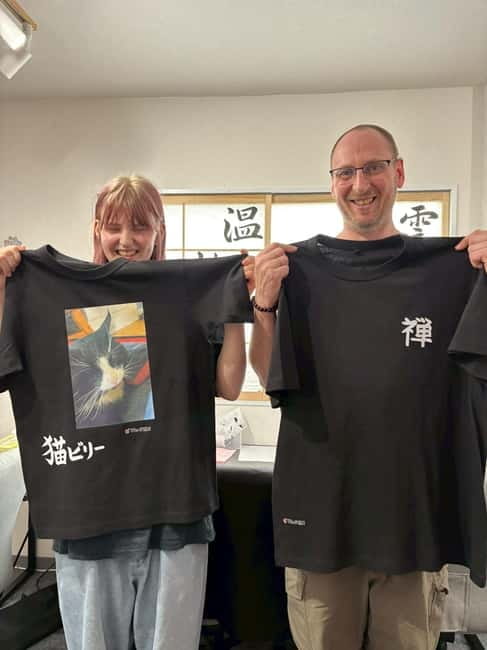
- T-shirt printing where you choose your design and where it lands on the shirt
- Green tea and a postcard you can keep as a real souvenir
Finding the Red Brick Building (and Getting There Without Stress)
This experience takes place in Honshu, and it’s easy to spot once you know what to look for. The meeting point is a red brick building on the 3rd floor. On the 1st floor, there’s a sign and the restaurant sits on that same level—then you go up the stairs to the right of the restaurant.
Plan to arrive about 10 minutes early. That small buffer matters because you’ll want time to get settled, put on your “ink clothes,” and start smoothly rather than feeling rushed. Also, the session starts with preparation and setup, so showing up on time helps you focus on the writing.
Practical tip: wear something comfortable but not precious. Even with careful instruction, ink is ink. Dark stains and smudges are the risk when you’re learning brush technique.
More hands-on studios our readers booked
- Tokyo Shinjuku Chopsticks Making Class
★ 5.0 · 1,763 reviews - Chopstick Making Workshop in Ginza
★ 4.8 · 1,366 reviews - Kintsugi Experience: Art of Golden Joinery in Tokyo
★ 5.0 · 467 reviews - Tokyo Chopstick Making Workshop with Artisan
★ 5.0 · 466 reviews
The Culture Starter: Japanese Characters and Why They Look the Way They Do
Before you touch ink, you get an expert-led introduction to the history behind Japanese writing. It’s not just a trivia dump; it’s the kind of context that makes the characters feel less random and more intentional. When you understand how Japanese characters connect to culture and daily life, your strokes mean something beyond aesthetics.
You’ll also be introduced to the tools and approach. The teacher uses a Japanese pen called Fude, and this part helps you grasp that calligraphy isn’t about making perfect shapes—it’s about controlling brush movement, pressure, and timing. That idea is especially important for first-timers, because your first strokes will look different than what you imagine.
If you’re the type who likes a small “why” before “how,” this intro is a big part of the value. It’s also useful if you’ve seen kanji in signs or books and want to understand what you’re actually looking at.
Meet the Fude and Learn the Basics Without Overthinking
Once you start practicing, you’ll learn how to hold and use the brush-pen style tool. The Fude concept is simple but transformative: a brush changes line width naturally based on how you guide it. That means the technique isn’t just about copying a shape—it’s about understanding how your movement shows up on the page.
There’s typically an early step where you copy or trace through starter shapes (often with kanji stencils). This helps you get oriented fast. You’re not expected to instantly produce “master-level” writing; you’re training your hand to create the right rhythm and stroke character.
I like that the class doesn’t punish mistakes. Instead, it gives you repeatable steps: practice first, select your direction, and then move to the final transfer on fabric.
Mixing Sumi Ink the Old-School Way (With an Inkstone)
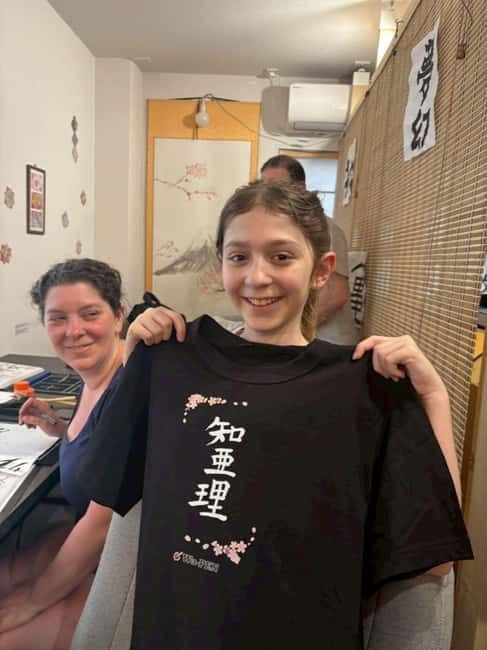
One of the most memorable parts is that you don’t just receive ink—you make ink. You’ll use water plus a Sumi ink stick, grind or work it with an inkstone, and then prepare your ink for writing.
This does two things for you. First, it slows you down in a good way, so your brush strokes feel more deliberate. Second, it gives you a deeper respect for why calligraphy looks like calligraphy—the ink behavior matters. When the ink is properly mixed, your lines flow with the right thickness and softness.
You’ll also have the classic supporting tools included, like an inkstone, paper-stopper, and under pad. That means you can focus on technique rather than hunting for supplies. If you’ve done crafts on your own while traveling, you’ll appreciate that the class takes care of the messy logistics.
The 30-Minute Practice Window: Thin Paper, Brush Control, and a Postcard
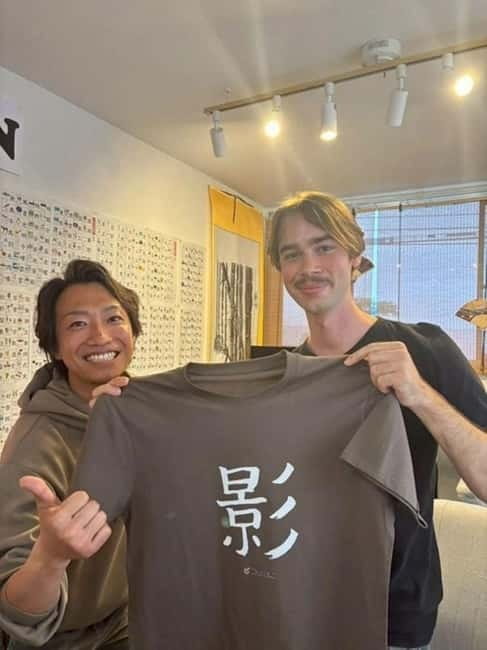
After ink prep, you’ll get a focused block of practice—about 30 minutes on thin paper. Thin paper forces good technique. It also makes the training feel real: you can see how your brush lines develop, and you learn how pressure changes the look of the stroke.
During this stage, you also create a postcard. That’s a smart choice for a souvenir because it’s portable, personal, and doesn’t require you to keep a fresh shirt pressed and folded perfectly. It also gives you something to do while your mind is still learning, which helps prevent the “I’m done too fast” feeling.
If you’re learning with kids or a mixed-skill group, this portion tends to work because you can practice at your own pace. Some people will move quickly through practice; others will take their time and refine.
A note on expectations: writing thin strokes can be harder than you think at first. That’s normal. The goal here is improvement through guided repetition, not perfection.
- Tokyo: Shinjuku Food Tour (13 Dishes at 4 Local Eateries)★ 5.0 · 6,603 reviews
- Tokyo Mt Fuji 5th St & Hakone Cruise Bus Tour w/Bullet Train★ 4.4 · 5,024 reviews
- Flagship 2-Hours Official Street Go-Kart Tour – Tokyo Bay Shop★ 5.0 · 4,974 reviews
- From Tokyo: Mount Fuji Full-Day Sightseeing Trip★ 4.5 · 4,970 reviews
- Tokyo: Hop-On Hop-Off Sightseeing Bus Ticket★ 3.9 · 4,207 reviews
Choosing Your Design and Printing on a T-Shirt
Now for the fun part: you pick your favorite design and choose where it will go on your clothing. This is where the class turns from learning to making something you’ll actually wear.
The process includes a step where your design gets printed onto your T-shirt. After about 10 minutes, the shirt is ready and you can take it home as a finished keepsake. The timing is also why this activity fits well into a travel day: it doesn’t consume your entire afternoon, and you’re not waiting around for hours.
What I like about the T-shirt format is that it turns practice into identity. You’re not just learning calligraphy—you’re choosing a personal emblem to carry with you. If you bring a shirt from home, there may be an option to print on it, depending on the session rules and what the teacher can accommodate.
Also, keep the placement decision in mind. Think about visibility: center chest often reads cleanly, but other placements can look great too if the design shape suits it.
Green Tea While You Write: The Souvenir Part That Feels Just Right
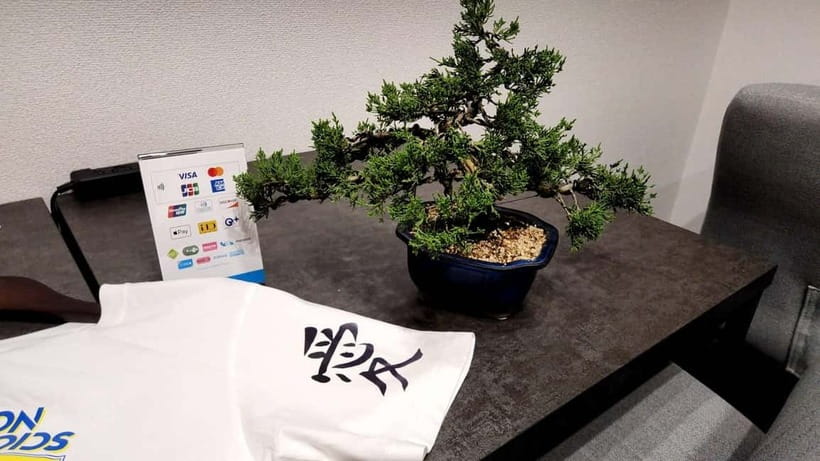
While the shirt printing happens, you get a cup of green tea and time to write your postcard. It’s a small ritual that makes the class feel more like a cultural moment than a fast workshop.
Writing the postcard is a practical souvenir. You can mail it later, keep it as a memory card, or send it to someone back home. And since the class includes the postcard and writing materials, you’re not stuck improvising.
This is also a nice pacing tool. You spend time writing and practicing, then you switch to writing something more relaxed and personal—like a travel diary in postcard form.
Price and Value: What $48 Really Buys You
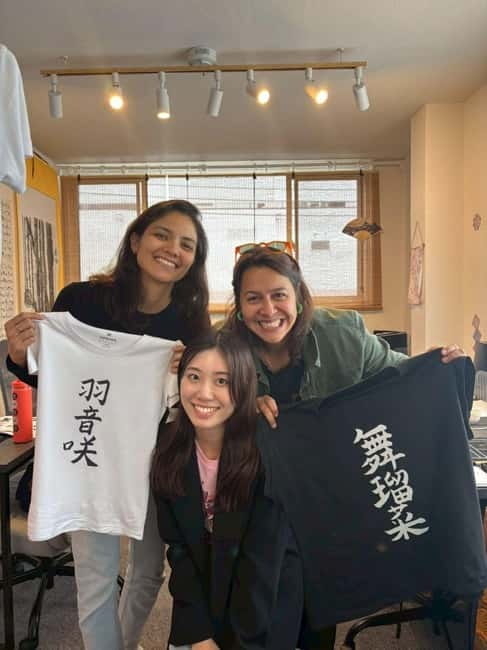
At $48 per person for 1 to 90 minutes, the value is mostly about what’s included. You get expert teaching, all necessary materials, and the final product: a custom printed T-shirt plus a postcard.
Most calligraphy experiences cost money for instruction, but you might still need to buy supplies or only leave with paper practice. Here, you leave with something wearable. That changes the value equation because you’re not just paying for a skill lesson—you’re paying for a finished item.
The class also covers the “hard parts” of materials management: pens, paper, ink, inkstone, and protective tools like the under pad. That’s a real savings of hassle, especially if you’re already juggling luggage and other activities.
So yes, it’s not free. But it’s priced like a true making experience—where the output is the point.
Who This Suits Best (and Who Might Find It Less Ideal)
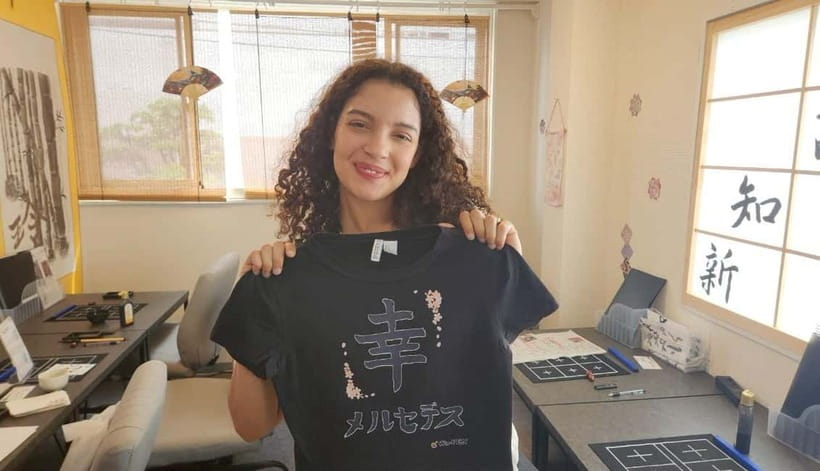
This class is a great fit if you want:
- a beginner-friendly way into shodo
- a souvenir you can wear (not just a paper sheet)
- a structured lesson with an expert in English
It also works well for families. The teaching style is described as patient and engaging, including for kids around elementary and early teen age. You’ll likely find the session pace supportive because you’re practicing in stages: history, tool basics, practice writing, then printing.
Who might not love it? If you hate mess and stained clothing is your nightmare, this could feel stressful. You can reduce risk by dressing in older layers and keeping your hands careful. But it’s still an ink workshop.
If you prefer long sightseeing breaks over active making, you might feel that it’s “too much class.” Still, the session isn’t that long, and the final shirt payoff helps it feel worth the effort.
Tips That Make Your Session Smoother
Here are practical moves that help you get more enjoyment out of the class:
- Arrive 10 minutes early so you can settle and prepare
- Wear comfortable clothes you don’t mind getting ink on
- Focus on strokes, not just copying the final character shape
- If you want to take photos, do it during the safer moments (before you start wet ink work)
- Plan your day so you have a bit of flexibility around the printing time
Also, if you’re staying nearby and you want to stack activities, consider doing it in the morning. That way, you can spend your waiting/switch-time exploring nearby areas, and still get your shirt printed within the class flow.
And keep an eye out for optional extras. In at least some sessions, Mana may offer an extension such as fan calligraphy for a small fee. If that sounds appealing, ask during the class.
Should You Book This Japanese Calligraphy T-Shirt Class?
Yes—if you want a hands-on souvenir that feels culturally grounded and not tourist-cookie-cutter. The big reason to book is the combination: you learn the basics, make the ink, practice carefully, and then you walk out with a printed T-shirt that looks like it belongs to you.
I’d especially recommend it if:
- you’ve never done calligraphy and want beginner guidance
- you like crafts where the final result is wearable
- you want something small and meaningful that doesn’t depend on buying extra items
If you’re extremely ink-averse or you’re expecting a “watch and observe” experience, you might find it less comfortable. But for most people, this is one of the most satisfying ways to spend an hour in Japan because you leave with a real artifact and a clearer sense of what Japanese characters actually involve.
FAQ
What is the duration of the calligraphy and T-shirt class?
The duration is 1 hour to 90 minutes, depending on the session timing.
How much does it cost?
It’s $48 per person.
What will I make during the class?
You’ll practice Japanese calligraphy and create a postcard, then choose a design and have it printed on your T-shirt.
Is the instruction available in English?
Yes, the instructor teaches in English.
What should I wear to the class?
Wear comfortable clothes you don’t mind getting ink on.
What is the meeting point exactly?
Meet at a red brick building on the 3rd floor. There is a sign on the 1st floor, the restaurant is on the 1st floor, and you should go up the stairs to the right of the restaurant.
Do I need to bring my own materials?
No. All necessary writing materials are included, including the pen, paper, ink, inkstone, and other tools.
What is the final timing for the printed shirt?
After you write and enjoy a green tea break, your T-shirt printing is completed after about 10 minutes, and your design is ready to take home.
More Tour Reviews in Tokyo
- Mt Fuji and Hakone 1-Day Bus Tour Return by Bullet Train
★ 5.0 · 26,383 reviews - 1-Day Tokyo Bus Tour
★ 5.0 · 14,250 reviews - Tokyo: teamLab Planets TOKYO Digital Art Museum Entry Ticket
★ 4.6 · 9,779 reviews - Mt Fuji & Hakone Cruise, Drum Show Bullet Train 1 Day from Tokyo
★ 4.0 · 7,413 reviews - Tokyo: Shinjuku Food Tour (13 Dishes at 4 Local Eateries)
★ 5.0 · 6,603 reviews
More Artisan Workshops in Tokyo
- Tokyo Shinjuku Chopsticks Making Class
★ 5.0 · 1,763 reviews - Chopstick Making Workshop in Ginza
★ 4.8 · 1,366 reviews - Kintsugi Experience: Art of Golden Joinery in Tokyo
★ 5.0 · 467 reviews - Tokyo Chopstick Making Workshop with Artisan
★ 5.0 · 466 reviews - Tokyo: Shinjuku Chopstick Making Class
★ 4.9 · 440 reviews
Latest Tokyo reviews off our desk




Craft & Artisan Workshops, compared.
 ★ 5.0Tokyo Shinjuku Chopsticks Making ClassFrom $201,763 reviews
 ★ 4.8Chopstick Making Workshop in GinzaFrom $251,366 reviews
 ★ 5.0Kintsugi Experience: Art of Golden Joinery in TokyoFrom $59467 reviews
 ★ 5.0Tokyo Chopstick Making Workshop with ArtisanFrom $26466 reviews
 ★ 5.0Authentic Pure Gold Kintsugi Workshop with Master Taku in TokyoFrom $142217 reviews
 ★ 5.0Calligraphy on Kanji Fan & Scroll with DrinkFrom $53210 reviews
Browse the lists this tour appears in