
Reviewed · KAMAKURA DAY TRIPS
Introducing all the Famous Spots in Kamakura and Enoshima!
Kamakura and Enoshima in one guided day. I love the no-transit-stress plan, and you get a tight hit list from Tsurugaoka Hachimangu to Enoshima’s views. The main consideration is you’ll walk a fair bit, and some entrance fees and even cash-only stops can add up.
A private setup is the second big plus. On past tours with guides like Kiko, Higara, and Sandy, the common thread is clear guidance and practical explanations—helpful when you’re trying to move fast in a place that can feel like a puzzle at first. The only potential drawback: since this is weather-dependent sightseeing, the route can shift on rainy days.
In This Review
- Key highlights you should care about
- Why this Kamakura + Enoshima combo works
- Price and what you really get for it
- Meeting at Kamakura Station and finishing at Enoshima Station
- The smart part: your guide rides the train with you
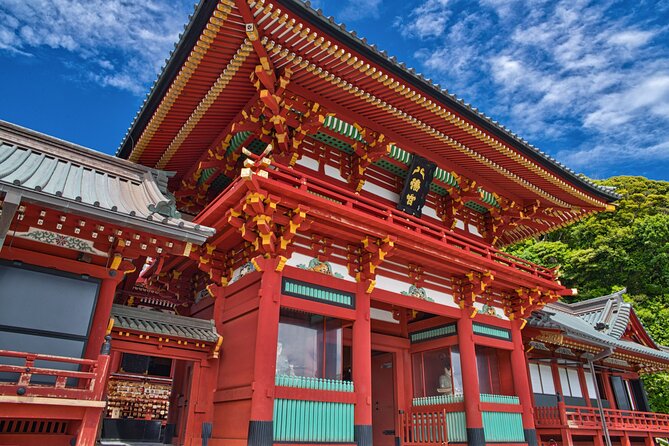
- Stop 1: Tsurugaoka Hachimangu Shrine and the Genji connection
- Stop 2: Komachidori street for snacks and local shopping
- Stop 3: Kotoku-in Great Buddha—how big is big?
- Stop 4: Hase-dera Flower Temple and seasonal walking
- Stop 5: Enoshima Nakamise Dori for takosen and whitebait bowls
- Stop 6: Enoshima Shrine and the first outdoor escalator
- Stop 7: Enoshima Sea Candle observatory for 360-degree views
- Timing and pace: a 7-hour day with real walking
- Cash, weather changes, and other small gotchas
- Who this tour suits best (and who should rethink)
- Should you book this private Kamakura and Enoshima tour?
- FAQ
- How long is the Kamakura and Enoshima tour?
- Is this tour private or shared with other groups?
- What time does the tour start and where do we meet?
- Where does the tour end?
- Which major attractions are included?
- Are admission fees included in the tour price?
- Should I bring cash?
- What happens if the weather is bad?
- Can I cancel for a refund?
Key highlights you should care about
- Guide rides with you on the train between sites, so you don’t waste time figuring out how to get from A to B
- Top Kamakura and Enoshima icons in one day, including the Great Buddha and Hase-dera
- Power-spot stops with extra meaning, like Tsurugaoka Hachimangu and Enoshima Shrine
- Practical food and shopping breaks, including Kamakura street snacks and Enoshima specialties like takosen
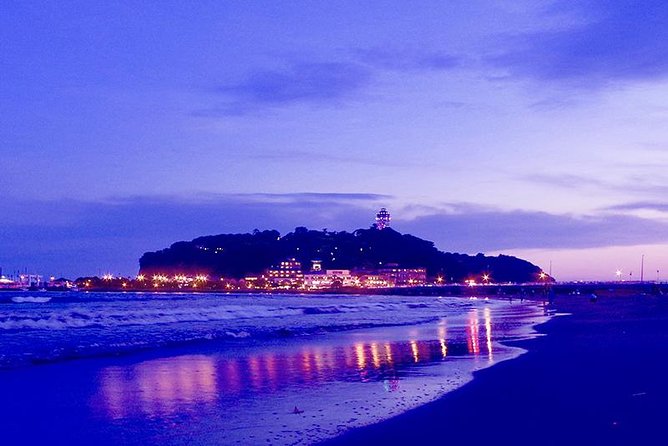
- Enoshima Sea Candle for a 360-degree observatory view and possible Mt. Fuji sighting
- Mostly flexible pacing because it’s private—your guide can adjust what to focus on
Why this Kamakura + Enoshima combo works
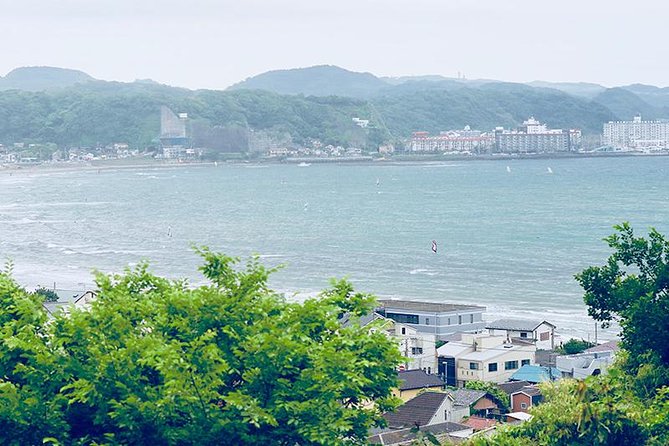
Kamakura and Enoshima are neighbors, but they feel like different worlds. Kamakura is temple-and-shrine Japan with old lanes and big gardens. Enoshima is the sea-town side: stairs, viewpoints, and that classic Shonan feel.
This tour is built for people who want a “best of” day without the usual back-and-forth research. You cover major stops like Tsurugaoka Hachimangu, Kotoku-in, Hase-dera, and then roll into Enoshima’s shrine and observatory areas in about 7 hours.
The private format matters here. Instead of a rigid group scramble, you get a guide who can help you keep moving, but also slow down where it matters—like letting you actually enjoy the grounds at Hase-dera instead of treating it like a checklist.
Coast-and-Buddha days near Kamakura, rated
- Tokyo: Kamakura & Enoshima Day Trip including Temple Tickets
★ 4.5 · 1,375 reviews - From Tokyo: Kamakura & Enoshima 1-Day Bus Tour
★ 4.5 · 189 reviews - Kamakura Historical Walking Tour with the Great Buddha
★ 5.0 · 129 reviews - Kamakura Private Tour: Temples, Nature, and the Great Buddha
★ 5.0 · 121 reviews
Price and what you really get for it
The tour is listed at $125.42 per person and runs as a private tour with a tour guide. That base price covers the guide and the necessary guide expenses during the tour—not your site entrances or meals.
On top of that, the operator provides an estimated spend of 2,510 JPY per person, with a breakdown including transportation (460 JPY), admission fees (1,050 JPY), and meal costs (1,000 JPY). One entrance fee is explicitly listed separately: Kotoku-in (Great Buddha) is 1,050 JPY per person.
So is it good value? In my view, yes—if you hate transit guesswork and you want someone to keep the day efficient. If you’re the type who enjoys DIY planning and doesn’t mind trains and ticketing, you might be able to do this cheaper on your own. But for most visitors, the time saved and the smoother route make the cost feel more reasonable.
Meeting at Kamakura Station and finishing at Enoshima Station
You start at Kamakura Station (Onarimachi area) at 10:00 am. The ending point is Enoshima Station, which is a big deal: you’re not dragged back to where you began, and that saves time and effort.
Also note a key practical detail: the tour finishing spot is different from the starting spot, and you can tell your guide if you’d like to change where you end. That’s handy if you’re trying to connect onward to dinner or your next destination.
Because this tour includes mobile ticket access, you should be ready to handle your ticket on your phone. And keep an eye on the tour note that some places don’t accept credit cards, so bring cash just in case.
The smart part: your guide rides the train with you
One of the best parts of this experience is the promise of no transport confusion. Instead of pointing you at a map and wishing you luck, the guide accompanies you on the train between sites.
That matters in Japan because lines can look simple until you’re standing there with limited time, bags, and a phone that has decided to act up. With the guide handling routing, you get to focus on what you came for: temples, shrines, and views.
It also makes the day feel more coherent. You don’t spend half the trip mentally calculating transfers. You just show up, follow your guide, and move on to the next major stop.
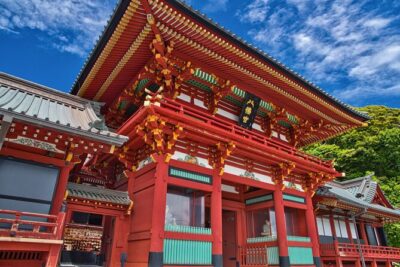
Stop 1: Tsurugaoka Hachimangu Shrine and the Genji connection
Your day starts at Tsurugaoka Hachimangu Shrine, a site with a history of over 1,000 years. It’s described as a power spot, and it’s tied to worship by Genji, who ruled Japan during the Kamakura era.
What I like about starting here: it sets the tone for the whole day. You get the old-world Kamakura identity immediately—this isn’t a quick roadside shrine photo. You’ll have time to experience the space and settle into the rhythm of temple and shrine visits.
Admission is listed as free for this stop, so it’s one less cost to track early in the day.
- Kamakura Walking Tour – The City of Shogun★ 5.0 · 100 reviews
- Kamakura: Private Guided Walking Tour with Local Guide★ 4.8 · 60 reviews
- Kamakura 4hr Private Trip with Government-Licensed Guide★ 5.0 · 58 reviews
- Kamakura Rickshaw Tour★ 5.0 · 53 reviews
- From Tokyo: Kamakura Full Day Tour with a Local Expert Guide★ 4.6 · 43 reviews
Stop 2: Komachidori street for snacks and local shopping
Next comes Kamakura Komachidori, a street lined with restaurants and souvenir shops running from Kamakura Station to Tsurugaoka Hachimangu. You get about 55 minutes, which is a real block of time—enough to snack, browse, and not feel rushed.
What makes Komachidori worth a full stroll is the local focus. The plan notes that you can find some foods in Kamakura that you may not be able to eat elsewhere, and that some items are harder to buy than you might expect.
If you’re the type who hates paying for a meal “just because it’s lunch time,” this stop is a practical alternative: you can build a lighter food plan from local bites and save the heavier meal for later.
Stop 3: Kotoku-in Great Buddha—how big is big?
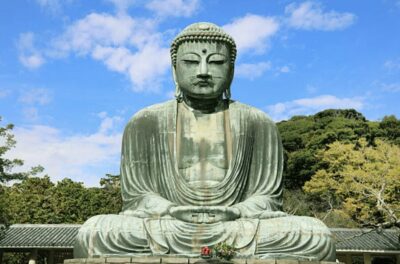
At Kotoku-in (Kamakura Daibutsu), you’re looking at a giant Buddha statue that’s more than 11 meters tall. Even better, the experience notes that you can go inside the statue, which turns it from a look-only photo stop into a more memorable visit.
The timing here is short—about 25 minutes—so don’t expect a slow wandering day inside. Go in with the right expectations: this is about seeing the scale and enjoying the special access.
Cost is the one thing you should plan for. The entrance fee is listed at 1,050 JPY per person, and it’s explicitly not included in the tour price.
Stop 4: Hase-dera Flower Temple and seasonal walking
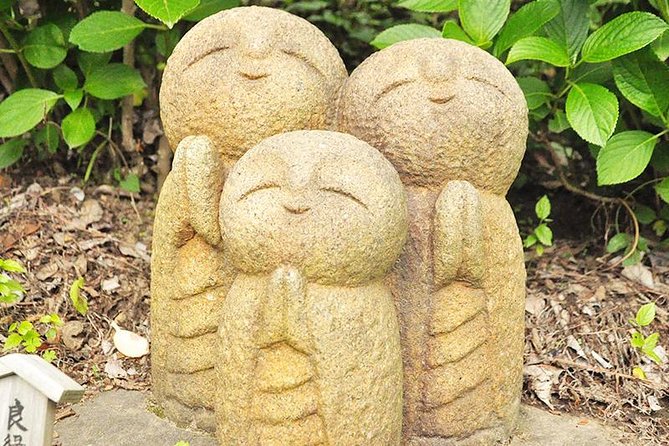
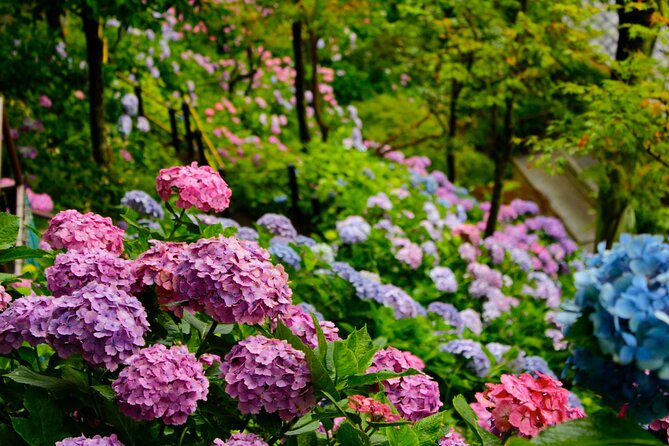
Hase-dera Temple, also known as the Flower Temple, is a highlight for a reason. The grounds are described as large, and you can enjoy plants representing all four seasons. There’s also a walking element as you climb through the temple area.
This is one of those stops where good shoes matter more than enthusiasm. With about 50 minutes, you can actually move through the space instead of doing a speed-run of the highlights.
Admission here is marked as not included, so expect an additional fee (your overall estimate includes admission costs). Still, if you want a balance of nature + history in one place, this is the kind of stop that delivers without needing a separate side trip.
Stop 5: Enoshima Nakamise Dori for takosen and whitebait bowls
Crossing into Enoshima brings a different vibe—more street energy, sea smells, and snack temptation. You’ll visit Enoshima Benzaiten Nakamise Dori, the shopping street connecting toward Enoshima Shrine.
This is a short stop—about 20 minutes—and it’s designed for quick tasting and browsing. The plan calls out specialties that you can enjoy here, including takosen and whitebait bowls.
Practical tip: if you want to taste a couple things, you might skip shopping for bigger souvenirs during the same moment. Try to treat this as your snack sprint, not your entire gift-buying marathon.
Stop 6: Enoshima Shrine and the first outdoor escalator
The shrine stop is Enoshima Shrine, again described as a site with a history of over 1,000 years and an important power spot. It’s also noted for a connection to the God of marriage, so it’s a fun stop if that theme interests you—or if you just like seeing how people pray.
One standout detail is the note about Japan’s first outdoor escalator, which helps you reach higher areas without turning the climb into a full workout.
You’ll get about 40 minutes here. That’s enough time to see the main areas, participate in the prayer moment if you want, and get moving toward the viewpoints before the day gets too tight.
Admission is listed as free for this stop.
Stop 7: Enoshima Sea Candle observatory for 360-degree views
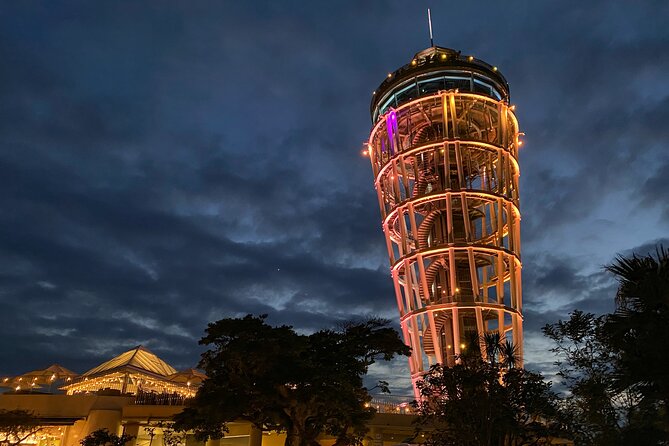
The final major viewpoint is Enoshima Sea Candle, an observatory deck in the area. It’s described as a lighthouse popular as a symbol of the Shonan area.
You’ll get about 20 minutes, and the big promise is a 360-degree panoramic view, with the possibility of seeing Mt. Fuji from Enoshima. That last part depends on weather and visibility, so don’t plan your whole emotional arc on that mountain appearing.
This is a smart closer because it gives you a skyline-and-sea ending instead of another temple interior. It’s also a nice “last chance to stand still” moment before you head to Enoshima Station.
Timing and pace: a 7-hour day with real walking
This is an action-packed day. You’re going to temples, shrines, and streets—and you’ll be on your feet for long stretches even if each stop is not extremely long.
The tour notes say to wear comfortable clothing because you’ll be walking a lot. I’d add: wear shoes you can trust on slopes and stairs, especially around Hase-dera and Enoshima areas where the terrain can be uneven.
One more timing factor: some of the sightseeing is explicitly short (like Kotoku-in and Sea Candle). That’s fine, as long as you treat those as “see it, feel it, move on” stops rather than expecting a long leisurely museum pace.
Cash, weather changes, and other small gotchas
Two practical points can save you stress:
First, some spots do not accept credit cards. The easiest fix is simple: bring enough cash for admission fees and snacks. This includes the big paid stop at Kotoku-in, plus whatever you choose to eat.
Second, weather matters. If it’s bad on the day, the operator notes that transportation, destinations, and routes may be changed. That’s normal for coastal and hillside sightseeing, but it’s good to go in with flexibility.
Also keep in mind: some sites might be temporarily closed, and stops can swap for alternatives. If a site is your top priority, tell your guide early so they can adjust your day based on what’s possible that day.
Who this tour suits best (and who should rethink)
This experience fits you if you want:
- A high-efficiency day that hits major Kamakura and Enoshima highlights
- A guide-led route to reduce transit stress and timing chaos
- A mix of temples, shrines, shopping streets, and viewpoints
- A private setting where you’re not boxed into everyone else’s pace
It might not be ideal if you:
- Want a super slow, open-ended day with long stays at fewer locations
- Plan to do heavy DIY browsing with no need for train guidance
- Are sensitive to walking and stairs, since multiple stops involve it
Because it’s private, you’ll get more direct attention from the guide—something I really value when you want context, not just directions.
Should you book this private Kamakura and Enoshima tour?
If you want the best of Kamakura and Enoshima in one day without getting tangled in trains, this is a strong choice. The guide-led transport is the selling point, and the stop mix covers the headline sights plus practical food and shopping breaks.
Book it especially if your time is limited and you’d rather spend your energy on the sites than on routing. Just budget for entrance fees and meals on top of the base price, bring cash, and wear shoes that can handle temple steps and Enoshima climbs.
FAQ
How long is the Kamakura and Enoshima tour?
It runs for about 7 hours.
Is this tour private or shared with other groups?
It’s a private tour/activity, so only your group participates.
What time does the tour start and where do we meet?
The start time is 10:00 am at Kamakura Station (1-chōme-1-15 Onarimachi, Kamakura, Kanagawa).
Where does the tour end?
The tour ends at Enoshima Station (Katasekaigan, Fujisawa). The finishing spot is different from the starting spot.
Which major attractions are included?
The tour plan includes Tsurugaoka Hachimangu Shrine, Kamakura Komachidori, Kotoku-in (Great Buddha of Kamakura), Hase-dera Temple, Enoshima Benzaiten Nakamise Dori, Enoshima Shrine, and Enoshima Sea Candle.
Are admission fees included in the tour price?
Admission fees are not included. Kotoku-in has an entrance fee listed as 1,050 JPY per person, and the operator also provides an estimated total spend of 2,510 JPY per person for transport, admission fees, and meals.
Should I bring cash?
Yes. Some of the spots visited do not accept credit cards, so bring cash for entrances and food.
What happens if the weather is bad?
If the weather is bad, the transportation, destinations, and routes may be changed.
Can I cancel for a refund?
Yes. You can cancel up to 24 hours in advance of the experience start time for a full refund.
More Tour Reviews in Kamakura
- Tokyo: Kamakura & Enoshima Day Trip including Temple Tickets
★ 4.5 · 1,375 reviews - From Tokyo: Kamakura & Enoshima 1-Day Bus Tour
★ 4.5 · 189 reviews - Kamakura Historical Walking Tour with the Great Buddha
★ 5.0 · 129 reviews - Kamakura Private Tour: Temples, Nature, and the Great Buddha
★ 5.0 · 121 reviews - Kamakura Walking Tour – The City of Shogun
★ 5.0 · 100 reviews
More Kamakura and Enoshima Days
- Tokyo: Kamakura & Enoshima Day Trip including Temple Tickets
★ 4.5 · 1,375 reviews - From Tokyo: Kamakura & Enoshima 1-Day Bus Tour
★ 4.5 · 189 reviews - Kamakura Historical Walking Tour with the Great Buddha
★ 5.0 · 129 reviews - Kamakura Private Tour: Temples, Nature, and the Great Buddha
★ 5.0 · 121 reviews - Kamakura Walking Tour – The City of Shogun
★ 5.0 · 100 reviews
Latest Kamakura reviews off our desk
Kamakura Day Trips, compared.
 ★ 4.5Kamakura & Enoshima Day Trip including Temple TicketsFrom $581,375 reviews
 ★ 4.5Mt. Fuji, Kamakura, Big Buddha, & Lake Ashi Day TripFrom $49867 reviews
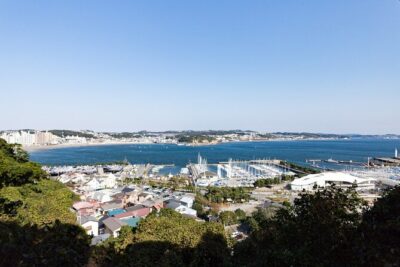 ★ 4.5From Tokyo: Kamakura & Enoshima 1-Day Bus TourFrom $66189 reviews
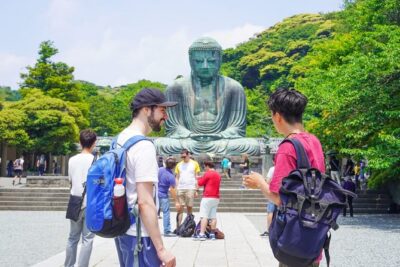 ★ 5.0Kamakura Historical Walking Tour with the Great BuddhaFrom $98129 reviews
 ★ 5.0Kamakura Private Tour: Temples, Nature, and the Great BuddhaFrom $98121 reviews
 ★ 5.0Kamakura Walking Tour – The City of ShogunFrom $35100 reviews
 ★ 4.9Sea of Mount Fuji, Hakone Ropeway, Ōwakudani, EnoshimaFrom $5084 reviews
 ★ 5.0Kamakura 8 hr Private Walking Tour with Licensed Guide from TokyoFrom $20180 reviews
Browse the lists this tour appears in